Below are instructions for setting up your email account in your iPhone
The screen images are from iOS8, but iOS9 should work the same.
First a bit of background about email technology. There are 2 standard methods (or protocols for setting up your email account: IMAP or POP. I’m going to assume, as Apple does by default, that you will want to use the IMAP protocol. IMAP is the most chosen option these days, it allows your email to synch across devices (computer-phone-tablet), basically it is cloud-based email.
Step 1
Go to your home screen and tap the settings icon:
Step 2
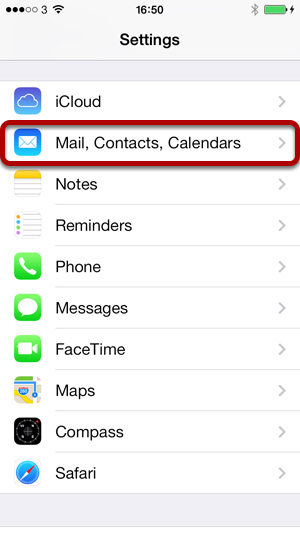
Scroll down the screen and tap Mail, Contacts, Calendars.
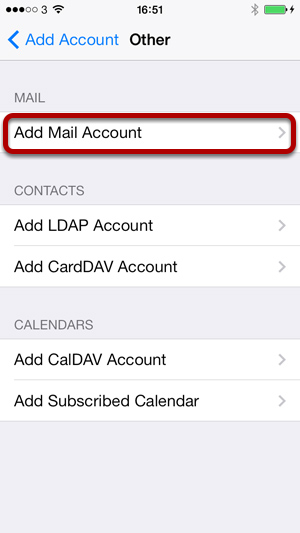
Step 3
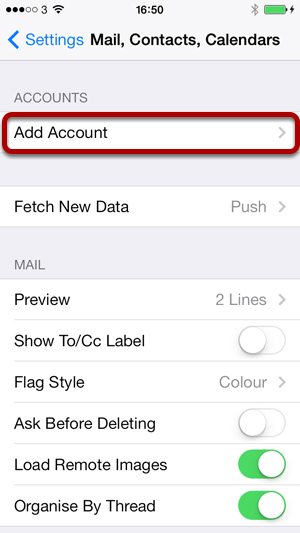
Tap Add Account
Step 4
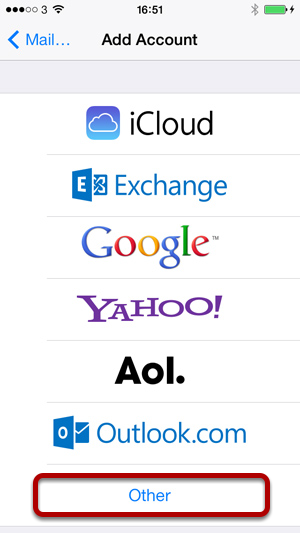
Several major email providers are listed but we are just Other, so tap that option.
Step 5
Tap Add Mail Account
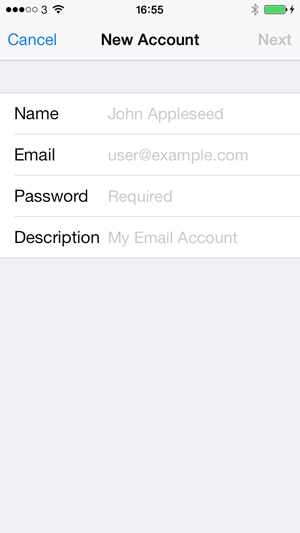
Step 6
Enter your initial account settings:
Name: Enter your name as will be seen by your email recipients.
Email: This should be the full email address.
Password: Carefully enter the password you were given (this is where a lot of setups go wrong).
Description: This is just a name you give the account so you can identify it when you check your mail, no one sees this but you.
When you are done, tap Next at the top right.
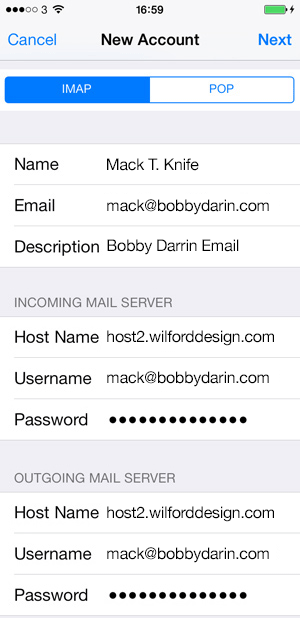
Step 7
IMAP Should be selected by default – if not, tap that option.
The first section with Name, Email and Description should be pre-filled with what you already entered.
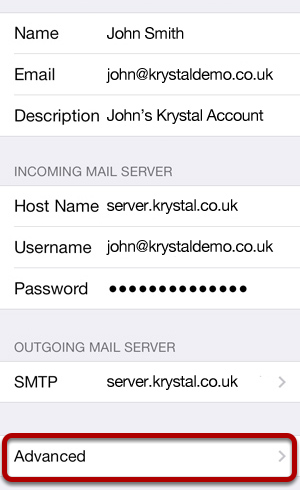
The information needed for both the Incoming Mail Server & Outgoing Mail Server is the same. These sections are not optional, both must be filled out completely.
Host Name: Enter the server address you were given in the email with your settings.
User Name: Enter your full email address.
Password: Enter your email password (carefully).
When you are done, tap Next at the top right. The iPhone will contact our server to verify the settings
If you get an error saying that your settings were rejected, then double check them and retype your password, very carefully. It’s almost always a typo in the settings that breaks it, sometimes a dot is left off somewhere.
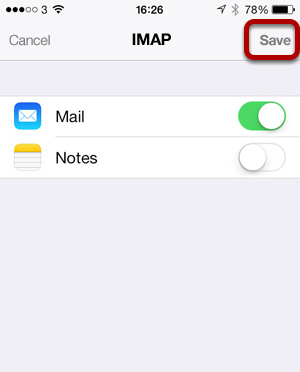
Step 8
If you got things right, you will be asked to save the account. You can turn Notes off at this point as you are probably using iCloud or some other service for that. Tap Save.
Step 9
iOS will take you back to the Mail, Contacts, Calendars setup panel. You need to go back into the settings to finish some advanced IMAP setup in order for it to work properly. So tap on the account you just created to go back into the settings for that account.
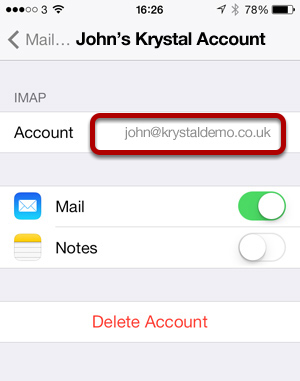
Step 10
Now you are back in your Account settings panel. Scroll to the bottom and tap the Advanced button to go into advanced settings.
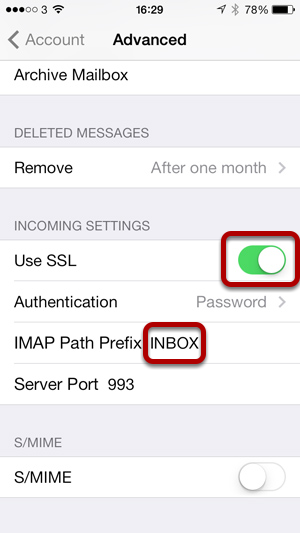
Step 11
Now you are in the Advanced settings, so scroll to the bottom of the screen and make sure that the Use SSL toggle is turned on as shown. You will then need to add the IMAP Path Prefix so it is set to INBOX. The Server Port should already be 993, which is correct.
Tap the Account button (top left) to return to the Account screen.
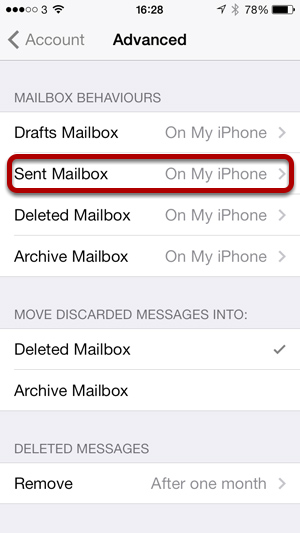
Step 12
Tap the Advanced button again (this is necessary for the app to pick up the new IMAP prefix we just entered).
On the Advanced screen, at the top under Mailbox Behaviors, you can see that iOS is using your phone version of the Drafts, Sent, Deleted, and Archive folders. You will probably want to synch at least some of your folders with the server folder, so for example all your sent messages are also saved on the server and accessible to your other devices. In order to do that, you subscribe to the server folder.
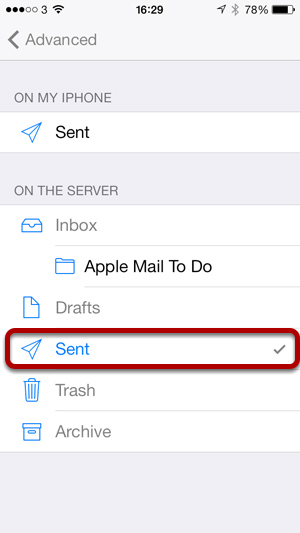
Let’s start with the Sent folder, so tap the Sent Mailbox.
Step 13
You will probably find that the Sent item ON MY IPHONE is currently checked. Tap on the Sent item under ON THE SERVER in order to save your sent items on the server instead. You should repeat steps 11 and 12 for the Deleted mailboxe. You can also do this for the Drafts and Archive mailboxes, although this isn’t as important unless you know you’ll be using those folders across devices.
When you are done – tap the Advanced button (top left) to return to the previous screen.
Step 14
Now you just need to save all of these settings, so Tap Done in the top right every time it appears as you exit from the settings back to the main Settings panel.