When it says “your-domain” below, you should substitute with your actual website domain.
Before you begin setting up your email
The first thing you need to decide before you set up your email is whether you want to use the POP or IMAP setup for your mail. You must choose correctly before you set up your email on your computer/phone/tablet because switching from one to another once you have it established is a hassle. Here is what you need to know about each:
POP email is the more traditional way that email has been setup. It is most useful for you if you are planning to use one computer or device to check your mail and you want to manage and store all your emails locally (on your hard drive). The way it works: your software, such as Outlook or Mac Mail, checks the server to see if you have any new emails. If you do, the software downloads them to your local inbox folder on your computer/device’s hard drive and then deletes the email just downloaded off the server (this deletion may happen immediately or after a month depending on your software settings). If you regularly receive large files in your email, POP may be the way to go as you don’t have to worry about space limitations on the server.
IMAP email is most beneficial for you if you will be accessing your email on multiple devices. An email will show up in each device unless you delete it, including sent mail. This is commonly thought of as email service “in the cloud” as all the storage and synchronization happens on the web server and can be accessed and managed with any of your devices (computer/phone/tablet) anywhere you have an internet connection. The downside to this is that your storage space is not unlimited on your hosting account, so if you don’t manage your emails, deleting unnecessary emails and archiving old ones outside your IMAP folders, then your hosting account can fill up which would require additional disk space for an additional fee.
Email Set Up
For a secure connection to your email, use the mail server: wilforddesign.wilforddesign.com
Use that for both your incoming and outgoing mail server. Check the option for using Secure Socket Layer (SSL) when accessing the server, that way your connection is secure for both incoming and outgoing, you’ll need to authenticate the connection with the user name and password.
Your user name for each account should be the entire email address.
Secure SSL/TLS Settings (Recommended to use secure connection:)
- Username: Your full email address (you@your-domain)
- Password: Use the email account’s password.
- Incoming Server: wilforddesign.wilforddesign.com
- IMAP Port: 993
- POP3 Port: 995
- Outgoing Server: wilforddesign.wilforddesign.com
- SMTP Port: 465
- Authentication is required for IMAP, POP3, and SMTP.
Online Tutorials
Here are some tutorials to set up your accounts in various applications (your version may vary, but these setup screens don’t usually change much, the settings in these tutorials are not valid, use the instructions above for those):
- Outlook 2013 Tutorial
- Outlook Express Tutorial
- Outlook Tutorial
- Mac Mail Tutorial
- iPhone Tutorial
- Android Tutorial
Using Webmail:
- You can log in to your email account online (with your browser) with webmail by going to:
http://www.your-domain.com/webmail
- The server will automatically forward you to our secure login page which is wilforddesign.wilforddesign.com:2906
- Use your full email address as your user name and input your password.
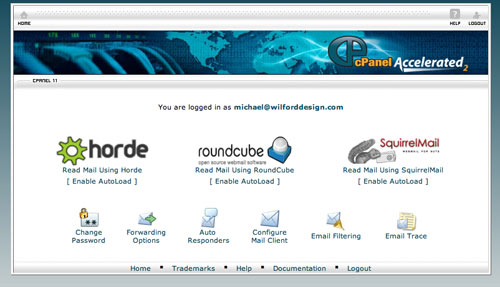
- There are links at the bottom of the initial screen where you can change their password, set up an autoresponder and access other functions. To read and send email through webmail the user can choose one of 3 email programs to access the same email. I recommend Roundcube as it is a terrific online application, just as good, if not better, than Outlook.
Email Spam Filter:
How to manage your email’s spam functions:
Flagged spam email which is sent to your spambox will be deleted after 15 days of receipt, please be sure to review them periodically so you don’t lose anything important. After a while the server will have a very good idea of what is and what isn’t spam for you.
Get Into Your Spambox
- All email which the server thinks is spam is placed in a folder on your email account called spambox. If you use IMAP for your email (smartphones usually do), then you should automatically see the spambox folder and can look through it to see if any emails are marked as spam which should not be.
- If you use Outlook or Mac Mail you are probably using POP to access your email. In that case you need to log in to webmail to view your spambox. Go to your domain in your web browser like this:
www.your-domain.com/webmail (insert your actual domain)
- Then log in with your full email address as your username and your password. All 3 web applications will work, Horde, Roundcube or Squirrelmail, however Horde and Squirrelmail are pretty clunky, so I suggest using Roundcube which is pretty nice.
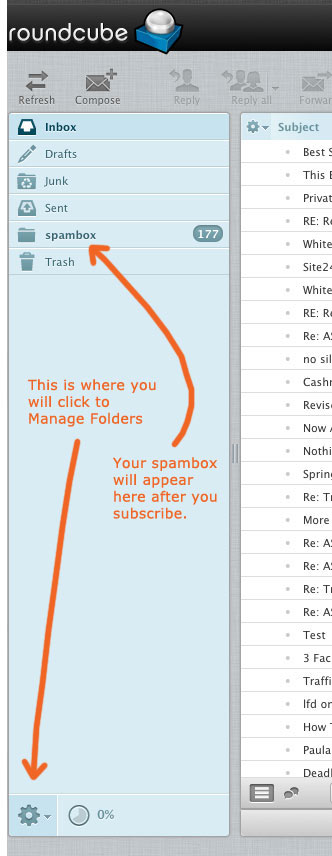
- Once inside Roundcube, you may have to “Subscribe” to your spam box folder if you can’t see it. In the lower left column there is a gear icon which when clicked allows you to “Manage Folders”. Click “Manage Folders” and you’ll go to a page where you can see the spambox folder and you just need to check the checkbox next to it to subscribe. Then click the “Mail” icon in the upper right to get back into your mail. Then click on the spambox folder to browse through the spam.
Now Whitelist An Email
- If you find an email from someone marked as spam that you don’t want to be marked as spam simply select the email in the list and click “Forward” in the icons above. Send that email to assp-notspam@your-domain.com (insert your actual domain). Now that sender will be whitelisted and not marked as spam in the future. You only need to do this process once for an email sender to whitelist them. You will receive a confirmation email from the server for each sender you whitelist, you can delete them, they are just a confirmation that the server received your request.
- It will be helpful and speed the process of whitelisting if you set up the asap-notspam@your-domain.com address in your Roundcube address book. For the first name use “Not”, last name use “Spam”. Then when you start to type that email address it will quickly fill it in for you, saving you time.
- You can also move an email that is in your Spambox into your Inbox. Just double click it so you can read the email, then in the upper right there is a drop down menu that says “Move to” where you can select “Inbox” and it will move it there.
An Easy Way to Whitelist a Sender Email
- Although this doesn’t help with emails that are already marked as spam, once you send an email to a recipient, that recipient is on the whitelist and their emails will no longer be flagged as spam.
An Optional Way to Review the Spam in your Spambox
- You can send an email from your account to assp-white@your-domain.com (insert your actual domain) and you will be immediately emailed back a list of all the spam emails in your spambox. It’s not always easy to tell what the emails are in this list, they have just brief info, but you can tell a lot from the email address it came from. If you want to whitelist a sender from this list, just click on the name and an email should open up ready to send to the server. Be sure to remove your email signature lines. Send that email and you should get a confirmation email right back.
How to Flag an Email as Spam
- If a spam email does make it to your inbox, simply forward it to assp-spam@your-domain.com (insert your actual domain).
Please either email call us if you have any problems or questions setting up or using your email account.